
The Final Product. Top View.

The Final Product. Back. I stitched the flowers to the barrettes and added a drop of hot glue
to secure it.


You will need: A hot glue gun and glue sticks, scissors (I used two sizes) felt in the color(s) of your choice, needle and thread, barrettes. (I used small ones for this project since she's still a little lady!)

First, cut out 5 flowers. 4 of similar size, 1 smaller. (I'm showing you a flower I made for a headband, but the process is the same for the barrettes, just different sizes. For the barrettes I used yellow felt for the small flower.) The 4 large flowers are for the main part of the flower, and the small 5th flower is an accent for the middle. I found that flowers cut with an irregular shape makes the final product cuter. I love projects that don't require perfection! :)

Add a small dot of glue to the center of the flower.

Fold and press!

Repeat the process for all 4 large flowers.

Take one of your glued large flowers and add a dot of glue, just above the center.

Place your 2nd flower on the glue as shown. Repeat this process in a circular motion for
the remaining flowers.

Once all 4 large flowers are glued, you will get a flower that looks like this.

Lightly pull and smush the petals around to get a shape you like. (please excuse my band-aide!
work hazards!)

Now take the 5th, smaller flower, add a dot of glue in the center and squish, smush and squeeze until you get a tight flower shape that you like. (technical terms people!) Then add one more dot of glue to your flower, and add this small flower to the center.

Your finished flower should now look something like this!
For making the barrettes, I simply stitched the flower to the barrette and used a little glue to adhere it. Voile cute flower barrette!
For a headband, I'll continue the tutorial.

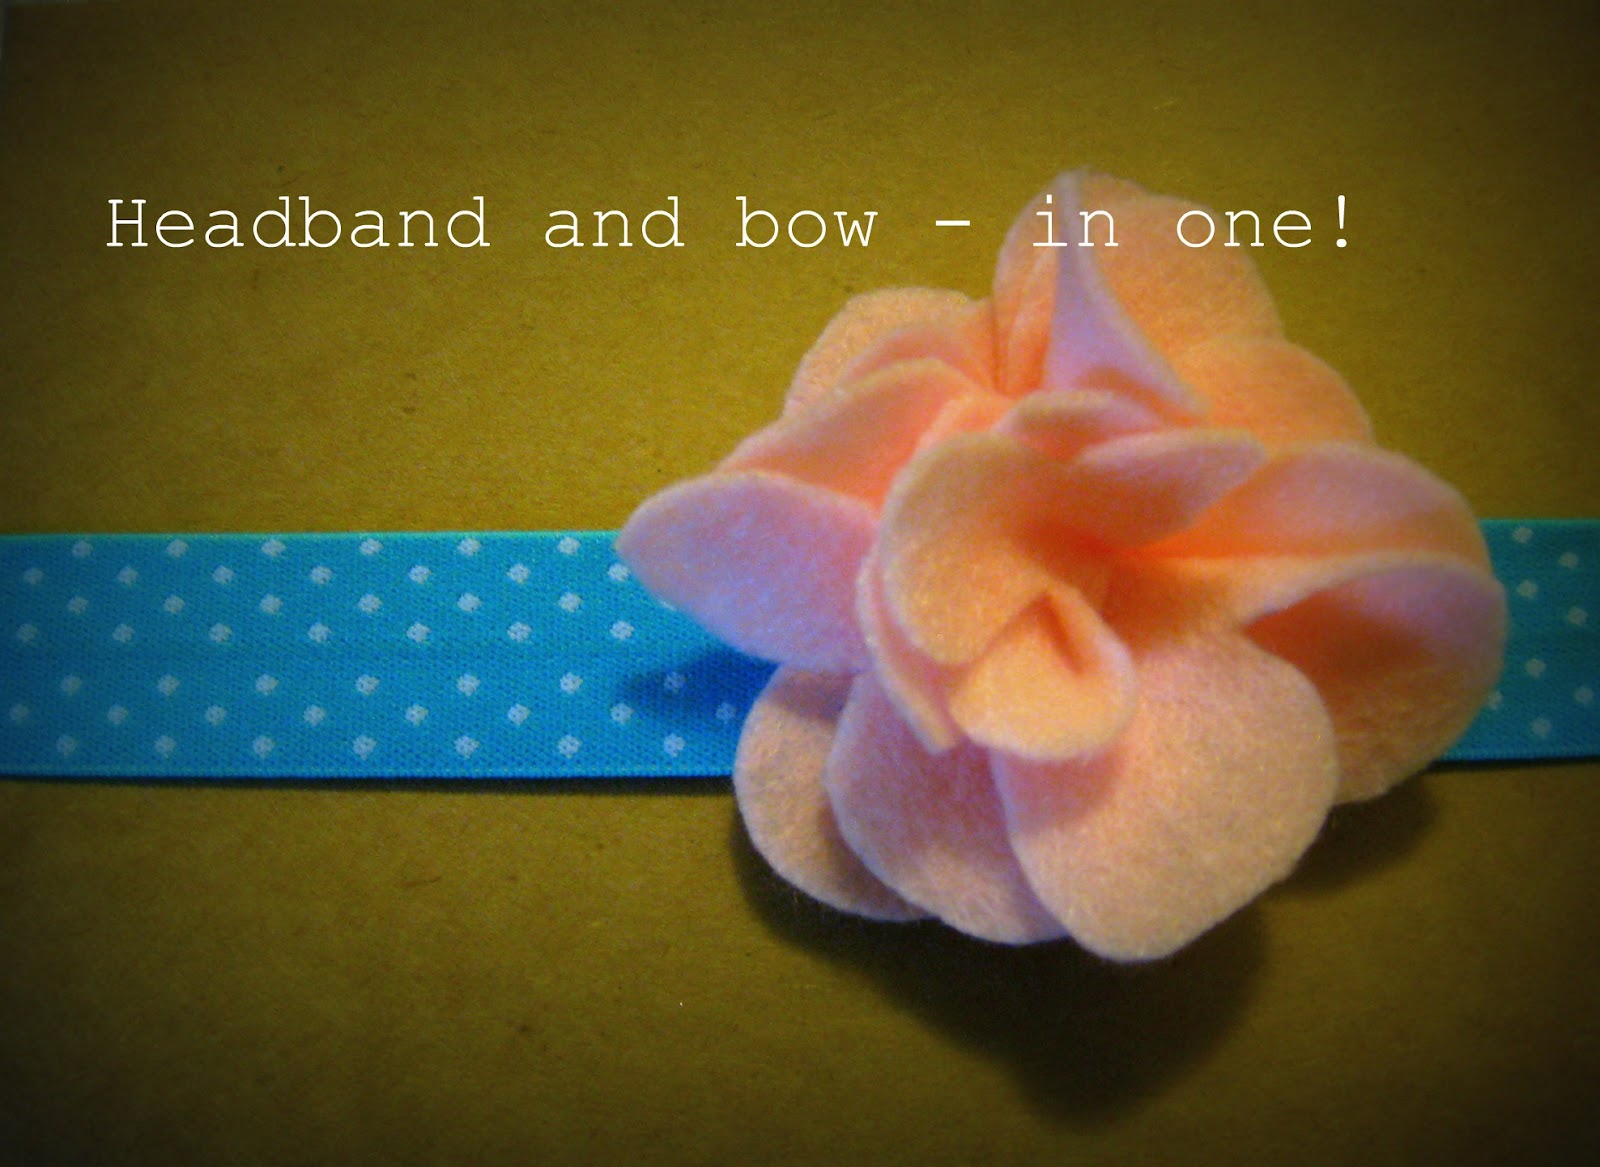
I found "baby safe" elastic at my local fabric store, cut it to about 14.5 inches, and glued the 2 ends together with about a half inch overlap. I then did a really quick stitch across the seam for strength. You can opt to just glue the ends together. I then glued the pink flower to the headband where the seam was.

On the underside of the headband, I glued a small piece of felt to hide the seam and add comfort.

The final product!
For added fun, I used the headband as part of the packaging for her gift!
So cute! (and I reused a birchbox from last month, and the headband perfectly hid the label!)

Happy Birthday Gracie!
I can't wait to make more for the little ladies in my life!
-kara


Loving the headband! What a great tutorial with the pictures! :)
ReplyDeleteSo cute! I've been wanting to get myself into crafts like these but can never find the time. Bookmarking this for later!
ReplyDeletethanks! It's hard for me to find the time sometimes too... but this project is super fast! Honestly, 5 min per headband! :) Thanks for checking out my blog!
Delete